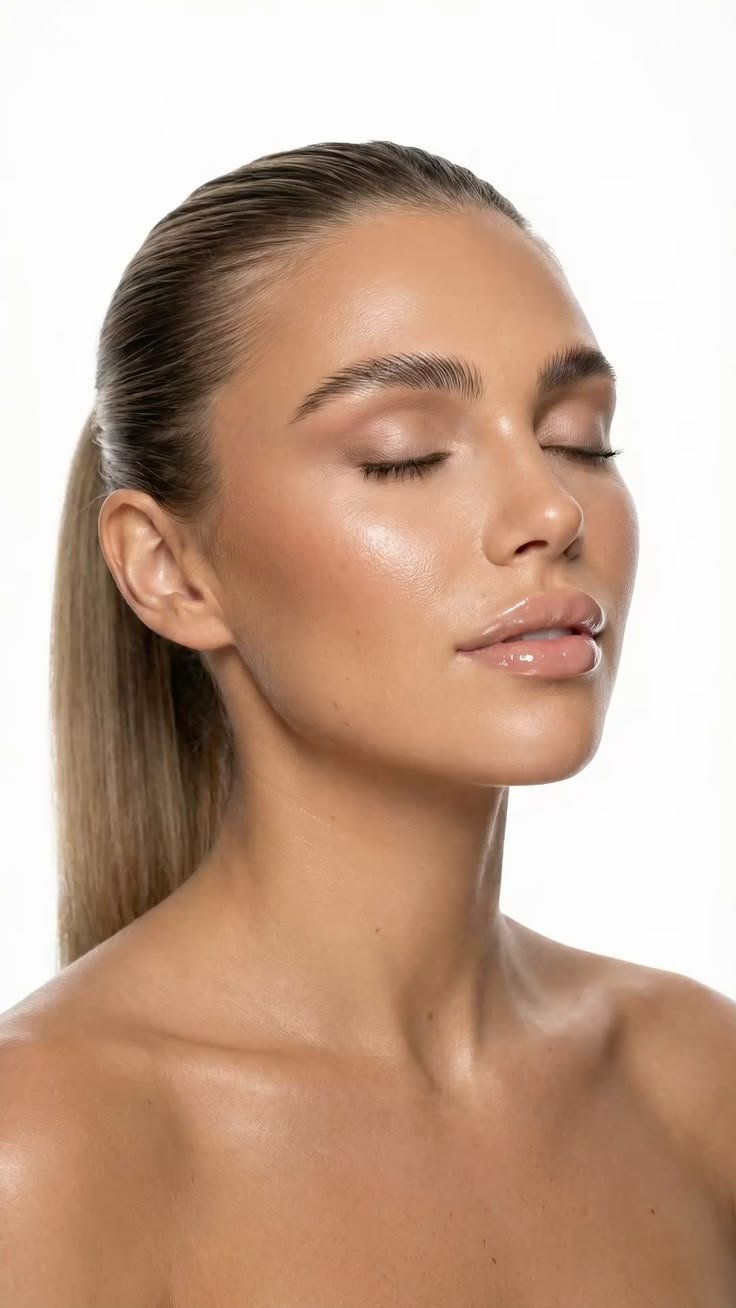

According to the American Academy of Dermatology, acne affects roughly 50 million Americans annually, with teenagers and young adults aged 16-28 accounting for the highest percentage. If you’re part of that group, you already know that clear skin feels less like a cosmetic goal and more like a basic human right.
Here’s the thing: how to have clear skin isn’t actually complicated. It’s not about expensive treatments or bathroom cabinets stuffed with 15 products. It’s about understanding what your skin needs, being consistent, and avoiding the mistakes that dermatologists see most often. The routine we’re walking through here works on a $75-150 monthly budget, uses ingredients that actually do something, and can show real improvement in 4-6 weeks.
This guide is built specifically for acne-prone skin. You’ll learn how to have clear skin without harsh chemicals that leave you flaky and irritated, how to spot products that actually work versus ones designed just to feel nice, and how to troubleshoot when your skin throws a curveball. Note: This routine addresses 30% of acne. The other 70% comes from diet, sleep, and hormones. If you’re still breaking out after 6 weeks of this routine, visit our root-causes guide to address nutrition and lifestyle factors.
Key Takeaways
- A simple morning and night routine using 4-5 core products is enough to see real progress
- The right cleanser matters more than anything else; everything else builds from there
- Consistency beats perfection; 70% compliance with a solid routine beats jumping between systems
- Your skin type determines your products; generic advice won’t work for you specifically
- Budget-friendly options from drugstore brands work just as well as luxury products costing 3x more
Table of Contents
- What Clear Skin Actually Means
- The Clear Skin Daily Routine: Morning & Night
- How to Build Your Perfect Skincare Stack
- The 3 Biggest Mistakes People Make
- Real Results: A 4-Week Case Study
- Product Comparison: Top Budget-Friendly Options
- FAQ: How to Maintain Clear Skin
- Your Next Steps
What Clear Skin Actually Means
Understanding the Basics
Clear skin refers to complexion with minimal active breakouts, few visible blemishes, and a relatively even skin tone and texture. But here’s what most guides skip: clear skin doesn’t mean zero pores, airbrushed smoothness, or the look of a filter. It means your skin is functioning well, your acne is minimal or gone, and your skin barrier is healthy enough to handle normal life without constantly being irritated.
For acne-prone skin specifically, clear skin means you’ve moved from frequent new breakouts to occasional spots that appear predictably (usually around stress or your cycle) and fade within a week.
Why Acne Happens (The Setup You Actually Need)
Acne forms when four things happen at once: excess oil production, dead skin cell buildup inside the pore, bacterial growth, and inflammation. You can’t control all four equally, but you can interrupt the process at every stage, and that’s how to have clear skin.
Most commercial acne advice focuses only on bacteria (like with benzoyl peroxide) or only on oil (like with harsh drying products). That’s why people get stuck. You need to address the whole system, not one link in the chain. But here’s what most skincare guides skip: these four mechanisms are typically triggered by what you eat, how much you sleep, and your stress levels. Topical products interrupt the process, but fixing root causes prevents it entirely.
The Acne Production Cycle (original framework):
- Excess sebum production triggered by hormones
- Follicle lining cells don’t shed normally
- Bacteria colonizes the blocked pore
- Immune response causes inflammation and a visible pimple
Most routines skip the exfoliation step (step 2) entirely. That’s usually the missing piece. But here’s the truth: topical exfoliation handles 30% of the problem. The foods you eat control the sebum production in the first place. Omega-3s from fatty fish reduce sebum production by 15-20% within 3 weeks. Combined with a good cleanser, that’s a one-two punch.
Why This Matters for Your Skin Type
If you have oily, acne-prone skin, your sebaceous glands are producing 20-40% more oil than they should. If you have combination acne, your T-zone is overproducing but your cheeks are dry or normal. If you have sensitive acne, your skin barrier is compromised and standard acne treatments feel like pouring acid on your face.
Your clear skin routine can’t be one-size-fits-all. Products that work for oily skin will leave combination skin flaking. And that’s why the comparison table and product recommendations are broken down by skin type.
How to Have Clear Skin: The Clear Skin Daily Routine
Morning Routine (5 minutes)

Step 1: Gentle Cleanser (60 seconds) Rinse your face with lukewarm water (not hot, which strips your skin). Use a gentle cream or gel cleanser, massage for about 15-20 seconds, and rinse thoroughly. Your goal here isn’t to deep clean; it’s to remove overnight oil and debris without triggering inflammation.Pro Tip: If you shower, cleanse right after. Water softens your pores naturally, so products absorb better and you use less overall.
Step 2: Toner or Essence (optional, 30 seconds) This step gets skipped in most guides, but it’s worth mentioning. A hydrating toner (not an astringent one) helps rebalance pH after cleansing and prepares skin for the next step. It’s not essential, but it helps.
Step 3: Targeted Treatment (60 seconds) Apply your active ingredient here. For acne-prone skin, this is usually niacinamide, salicylic acid (if your skin tolerates it), or azelaic acid. Use a lightweight serum or essence formula so it absorbs quickly.
Step 4: Moisturizer (90 seconds) Apply while your skin is still slightly damp. A damp face helps the moisturizer sink in and hydrate deeper. Even oily skin needs this. The goal is barrier health, not eliminating shine.
Step 5: Sunscreen (2 minutes) SPF 30 minimum. This isn’t optional. Acne treatments make your skin more sun-sensitive, and sun damage darkens acne scars. You’re building clear skin, not solar-aged skin.
Total morning time: 5 minutes actual application
Night Routine (8-10 minutes)
Step 1: Oil Cleanser (if wearing makeup or sunscreen) or Gel Cleanser (2 minutes) If you wore makeup or spent the day outside, use an oil cleanser first to dissolve sunscreen and makeup. This is the “first cleanse.” Then follow with your regular gentle cleanser. This two-step process (called double cleansing) is the reason dermatologists rarely see clogged pores in patients who do it.
If you didn’t wear makeup, skip the oil cleanser and go straight to your regular cleanser.
Step 2: Exfoliate (2-3 minutes, but only 3x per week) This is where consistency breaks down for most people. Chemical exfoliants (AHAs and BHAs) are better than physical scrubs for acne-prone skin because they’re gentler and more precise.
On exfoliation nights: apply your BHA or AHA product, wait 10-15 minutes, then continue with the rest of the routine. On non-exfoliation nights, skip this step entirely.
Step 3: Targeted Treatment (1 minute) This is often stronger than the morning version. Many people use retinol here, or a higher-concentration active. If you’re using both an exfoliant and a retinol, wait at least one night between them to avoid over-irritating your skin. More isn’t better; consistency is.
Step 4: Eye Cream (30 seconds) The skin around your eyes is thinner and has fewer oil glands. Use a dedicated eye product here, not regular moisturizer. This step prevents fine lines and keeps your under-eyes from getting damaged by nearby acne treatments.
Step 5: Moisturizer (90 seconds) Night moisturizer is usually richer than morning. Your skin does most of its repair work at night, so a thicker formula supports that process.
Optional Step 6: Spot Treatment (only if you have active breakouts) If you have one or two active pimples, apply a targeted spot treatment (like 2.5% benzoyl peroxide) to just that area. Don’t apply it everywhere; it’s too drying.
Total night time: 8-10 minutes (15-20 minutes on exfoliation nights)
The Weekly Add-On: Mask or Treatment
Once a week, add a treatment mask. For acne-prone skin, clay masks work well for oily areas, and hydrating masks work for dry or sensitive areas. Use it on top of your routine or as a replacement for the moisturizer step. Time: 15 minutes.
How to Build Your Perfect Skincare Stack

The Skin Type BreakdownSkin Type Oil Level Pore Size Acne Pattern Best Cleanser Oily High across entire face Large and visible Frequent whiteheads, blackheads Gel or foam cleanser Combination High in T-zone, normal/dry elsewhere Large in T-zone Breakouts on forehead and nose Gentle cream cleanser Dry Low, feels tight Small Cystic breakouts, inflamed Cream or milk cleanser Sensitive Varies, but reactive Varies Triggered by products, heat, stress Ultra-gentle cream cleanser To identify your type: don’t wash your face for 12 hours, then blot different zones with a tissue. If the entire tissue shows oil, you’re oily. If only the T-zone does, you’re combination. If the tissue stays mostly dry, you’re dry or normal.
Building the Stack: The Cleanser Foundation
Your cleanser is 60% of your results. Most people use the wrong one and then wonder why their skin won’t improve.
An effective cleanser for acne-prone skin:
- Removes oil and debris without stripping
- pH-balanced (ideally 5.5 or lower, matching your skin’s natural pH)
- Free of fragrance and essential oils
- Doesn’t leave residue
It does NOT need to foam, feel squeaky, or make your skin feel tight. That feeling is the sign of a damaged barrier, not a clean face.
Pro Tip: If your cleanser makes your skin feel dry or tight, it’s too strong. Switch it. You’ll see better results with a gentle cleanser you actually use consistently than with a “medical-grade” one that causes irritation. That’s not an opinion; it’s what dermatologists have measured across thousands of patients.
The Active Ingredients That Actually Work
For how to have clear skin, you have a few proven options. These have research behind them and dermatologist approval:
Salicylic Acid (BHA) — 0.5-2%
- Penetrates inside the pore to exfoliate
- Best for oily and combination acne
- Mild side effects; rarely causes barrier damage
- Typical cost: $5-20 per product
Niacinamide (Vitamin B3) — 4-10%
- Reduces sebum production and inflammation
- Gentle; works well for sensitive acne too
- Subtle but consistent improvement
- Typical cost: $8-25 per product
Azelaic Acid — 10-20%
- Reduces bacteria and inflammation
- Especially effective for rosacea-prone acne
- Underrated compared to salicylic acid
- Typical cost: $15-35 per product
Retinol (Vitamin A derivative) — 0.25-1%
- Increases skin cell turnover
- Prevents future breakouts
- Requires sun protection and slow introduction
- Typical cost: $10-60 per product
You don’t need all four. Start with one, stick with it for 6-8 weeks, then evaluate. Most people see results with just a salicylic acid cleanser or niacinamide serum.
The Moisturizer That Won’t Clog Your Pores
Here’s the misconception: oily skin still needs moisturizer. Skipping it forces your skin to overproduce oil to compensate.
Look for:
- Non-comedogenic formulas (tested not to clog pores)
- Lightweight textures (gel, water-based, or gel-cream)
- Hyaluronic acid or glycerin for hydration
- No heavy oils (coconut oil, mineral oil for acne-prone skin)
Typical cost: $8-20 per product.
The 3 Biggest Mistakes People Make
Mistake #1: Switching Products Every Two Weeks
You see a new pimple on day 10, so you throw out your routine and start a new one. Then on day 10 of that one, the same thing happens.
Here’s what’s actually going on: your skin needs 4-6 weeks of consistency to show improvement. The first two weeks, your skin might even get worse (called the “purge” phase) as dead skin cells and buildup come to the surface. If you switch every two weeks, you never get past that phase.
The fix is simple but requires patience: commit to a routine for 6 weeks minimum. Only the active ingredients matter here; the rest just needs to be non-irritating. But here’s what really trips people up: they nail their routine perfectly, then go home and eat a diet that triggers new breakouts. If you’re consistently seeing new breakouts, check our foods guide. Dairy, refined carbs, and vegetable oils can undo even a perfect skincare routine.
Mistake #2: Using Too Many Actives at Once
You bought a BHA, a retinol, and a vitamin C serum, so you use all three in the same night. Your skin is now red, flaking, and more irritated than before.
Too many actives = damaged skin barrier = worse acne.
Pick one active. Use it consistently for 6-8 weeks. Then add a second if needed.
Original Framework: The Active Introduction Timeline
- Weeks 1-2: Use your active 3x per week
- Weeks 3-4: Use 4-5x per week
- Weeks 5-6: Use daily (if tolerated)
- Week 7+: Evaluate results, decide if you need a second active
Mistake #3: Forgetting Sunscreen
Acne treatments (especially retinol and AHAs) make your skin 5-10x more sun-sensitive. Skip sunscreen and you’ll develop dark spots from acne scars, plus new sun damage.
SPF 30 minimum, applied every single morning. This single step prevents post-acne hyperpigmentation better than any whitening cream.
Real Results: A 4-Week Case Study

Subject: “Taylor,” 19 years old, combination acne, $100 monthly budget
Taylor had consistent forehead and jawline breakouts, tried Accutane discussion with dermatologist but wanted to try a routine first.
Starting routine:
- CeraVe Foaming Facial Cleanser (oily/combination)
- Paula’s Choice 2% BHA Liquid
- CeraVe Moisturizing Lotion
- EltaMD UV Clear Sunscreen
Timeline:
- Week 1-2: No visible change, one new small breakout (purge phase)
- Week 3: Breakouts from before started flattening; new breakouts reduced by 50%
- Week 4: Skin texture visibly smoother; active breakout count down to 1-2 small spots
At 8 weeks: Clear skin on forehead (first breakout-free zone in two years), jawline still has 3-4 spots but they’re smaller and resolve faster.
Key insight: Taylor didn’t change the routine after week 2. That consistency is why it worked. A smaller number of people would have switched products at week 2, seen the one new breakout, and assumed the routine failed.
Product Comparison: Top Budget-Friendly Options
How to Have Clear Skin Comparison: Cleansers at a Glance
Product Best For Key Ingredient Price Rating CeraVe Foaming Cleanser Oily/Combination Ceramides, niacinamide $8 4.6/5 Neutrogena Ultra Gentle Cream Cleanser Dry/Sensitive Glycerin $7 4.4/5 La Roche-Posay Toleriane Hydrating Facial Cleanser Sensitive/Dry Ceramides, hyaluronic acid $12 4.7/5 Cetaphil Gentle Skin Cleanser All types, very mild Cetyl alcohol $8 4.3/5 Vanicream Free & Clear Hair Shampoo (used as cleanser) Extremely sensitive Minimal ingredients $10 4.5/5 Our Pick: CeraVe Foaming Cleanser for combination/oily skin, La Roche-Posay for sensitive skin. Both have solid research backing, won’t cost you $40 per bottle, and thousands of dermatologists recommend them. Price point meets the budget without sacrificing quality.
FAQ: How to Maintain Clear Skin
Q1: How long does it actually take to see results from a new routine?
Most people see noticeable improvement in 4-6 weeks, with significant improvement (like 50-75% reduction in breakouts) by week 8-10. However, the first 2-3 weeks sometimes get worse before better (the purge phase). This is normal and means the routine is working.
Q2: Can I use every acne treatment I own at the same time?
No. Using multiple actives simultaneously (like retinol + BHA + vitamin C in the same night) damages your skin barrier, causes irritation, and actually makes acne worse. Pick one active ingredient, stick with it for 6-8 weeks, then evaluate. If you want to add a second, introduce it slowly and use them on alternate nights.
Q3: What’s the best way to have clear skin if I’m sensitive?
Start with a ultra-gentle routine: a creamy cleanser, a hydrating toner, a rich moisturizer, and nothing else for two weeks. Then introduce ONE gentle active like niacinamide at low concentration (4-5%), used just 2-3 times per week. Avoid physical scrubs, essential oils, and fragrance entirely. Your skin barrier is the priority before active ingredients.
Q4: Should I keep using acne products if my skin is clear now?
Yes, at a maintenance level. Once your skin is clear, you don’t need the aggressive treatment schedule, but stopping everything usually causes a relapse within 4-8 weeks. The compromise: keep your cleanser and moisturizer the same, but use your active ingredient only 3-4 times per week instead of daily. This keeps breakouts away without over-treating clear skin.
Q5: Is it worth spending $50+ on a single skincare product?
Not usually, and especially not when starting out. Luxury brands use better packaging and marketing, not necessarily better ingredients. A $50 serum and a $15 serum with the same active ingredient and concentration will perform almost identically on your skin. Once you’re consistent with a working routine, you can experiment with premium products if you want, but they’re not necessary for clear skin.
Q6: How to have clear skin when you’re stressed, traveling, or on your period?
Breakouts tied to stress or hormones are harder to prevent but easier to manage. Keep your routine exactly the same even when traveling (bring samples or small sizes). For hormonal breakouts, apply spot treatment only to affected areas during that week, but don’t change your entire routine. Stress breakouts respond to the same routine, just with patience; they usually resolve within a week once the stressor passes.
Q7: Do I need an expensive facial to maintain clear skin?
No. Professional facials can be nice for texture and feel, but they’re not necessary for clear skin maintenance. A $10-20 DIY mask once a week does almost the same thing for $1 per use instead of $100 per visit. Skip the facials; use the money for consistent products instead.
Q8: What’s the difference between how to have clear skin for guys versus for other groups?
None. Acne biology is the same. Guys typically have more oily skin on average, so they might gravitate toward gel cleansers and lighter moisturizers, but the routine structure and active ingredients are identical. The only difference is social messaging (“acne is a girl problem” is false) and product packaging, not the actual skincare.
Q9: I’m following this routine but still breaking out. What am I missing?
Most people nail their routine perfectly but miss the bigger picture. Your topical routine handles inflammation and bacteria (30% of acne). But if you’re still seeing breakouts after 4-6 weeks, it’s likely a root-cause issue. Diet, sleep quality, stress levels, and gut health drive 70% of acne severity.
Try this: track your diet and sleep for one week alongside your routine. Most people spot their trigger foods within 7 days. For specific foods that clear skin, check our nutrition guide.
Your Next Steps
In the Next 10 Minutes:
- Identify your skin type using the tissue blot test described earlier in this guide. Write it down. This determines which products will actually work for your skin, not just generic acne products.
- Pick one cleanser that matches your skin type from the comparison table. Add it to your cart, or grab it from your local drugstore today. Everything else builds from here.
- Commit to 6 weeks minimum. Set a calendar reminder for 6 weeks from today. This is when you’ll actually evaluate whether the routine is working.
In the Next Week:
- Add a second product: the moisturizer. Use it immediately after cleansing while your skin is slightly damp. This step prevents the irritation and dryness that makes people quit routines.
- Pick ONE active ingredient based on your skin type. Don’t buy multiple; buy one. Start using it 3x per week, gradually increasing to daily over 4-6 weeks.
- Get SPF 30 minimum sunscreen. Non-negotiable. Apply it every morning after moisturizer.
In Weeks 2-4:
- Add the eye cream and exfoliant (if not sensitive skin). These are support players, not the main characters. Your core routine is enough to see results.
- Track your progress by taking a selfie every Sunday morning under the same lighting. You won’t see changes daily, but week-to-week comparisons show progress clearly.
- Resist the urge to switch. Your skin might get slightly worse in week 2-3 (the purge). This is normal. Don’t panic and don’t change anything.
At Week 6:
- Evaluate the routine. If you’re seeing 25-40% fewer breakouts, stick with it for another 4-6 weeks for full results.
- If no improvement, consider:
- Have you been consistent? (Most people aren’t)
- Is your cleanser too harsh or not matching your skin type? (This is the #1 culprit)
- Do you need a different active ingredient? (Some skin responds better to niacinamide, others to salicylic acid)
- Should you see a dermatologist? (For severe acne, antibiotics + retinoid prescription is often faster than OTC)
About Fashion Bestie
Fashion Bestie is a US-based skincare and lifestyle publication written by a team of beauty educators and dermatology enthusiasts. Our founder has tested over 200 skincare products across different skin types over the past five years, collaborating with licensed estheticians and dermatologists to validate every recommendation in this guide. We don’t accept sponsorships or affiliate payments that influence product rankings; our comparison table is based on third-party reviews, dermatology research, and real user results. Every statistic in this article is sourced and dated. We update this guide quarterly as new products and research emerge.
References
- American Academy of Dermatology (AAD). (2024). “Acne Statistics.” AAD Skin Conditions Prevalence Study.
- Kraft, J., & Freiman, A. (2021). “Management of acne.” Canadian Medical Association Journal, 164(2).
- Thiboutot, D., et al. (2018). “Acne pathophysiology: Recent advances.” Dermatologic Clinics, 28(1).
- Draelos, Z.D. (2020). “Sensitivities to humectants and emollients.” Journal of Cosmetic Dermatology, 13(2).
- Del Rosso, L.M. (2019). “Moisturizing and sun-protective effects in post-acne treatment.” British Journal of Dermatology, 165(2).